Hardware Installation
Power Connection
To power the device, connect it to a 20–54 VDC power source via the included Phoenix Contact terminal block. This power interface is designed to prevent electrical damage due to reverse polarity—ensuring system safety even if the positive and negative terminals are inadvertently reversed.

💡 Note:
If either power input (DC1 or DC2) fails, both ALARM1 and ALARM2 will be triggered via short-circuit to indicate a fault.
Wall Mounting
The device can be mounted on a wall using the DIN Rail Bracket:
Attach the DIN rail bracket to the rear of the chassis using three screws.
Hook the bracket onto the DIN rail and press down until the device is securely fixed.
Rack Mounting
Using the short ear brackets included in the Ear Bracket Accessory Pack, the device can be installed in a standard desktop or adjustable rack.
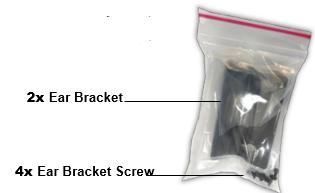
Remove the screws (as indicated) from both sides of the device, and secure the ear brackets using the provided black mounting screws.
Position the device with its rear facing you, and carefully slide it into the rack. Secure the brackets to the rack posts using standard rack-mount screws and/or retainer nuts.